Split Loves Flutter!
Everything you need to know to integrate the two!
What are Flutter and Split?
![]()
![]()
Flutter is a cross-platform framework for designing beautiful mobile apps. Split is the premier feature delivery platform, feature flags and experimentation. If you’re building your app in Flutter, you can take full advantage of Split’s platform using the step-by-step techniques covered in this article. Dart is the programming language for Flutter. It has a lot of advanced features.
With logos so alike, how can’t it be a good fit?
Install Flutter
Flutter can be installed here. Flutter provides Windows, OSX, Linux, and ChromeOS installers. When you’re finished, you should be able to type:
> flutter doctor
This article was last tested with this version of Flutter and Dart.
> flutter --version
Flutter 2.10.2 • channel stable • https://github.com/flutter/flutter.git
Framework • revision 097d3313d8 (2 days ago) • 2022-02-18 19:33:08 -0600
Engine • revision a83ed0e5e3
Tools • Dart 2.16.1 • DevTools 2.9.2
Creating a Flutter app
Create a directory for your Flutter app, e.g. "flutter_workspace".
Again at the command line:
> flutter create -t app --project-name to_the_dogs /path/to/your/flutter-workspace/to_the_dogs
This will create a brand new application. You can run the app too. Change to your new to_the_dogs app directory and type:
> flutter run
You will see your new app in Chrome

Running in Chrome is a neat new Flutter trick. But you want to see your app run in a mobile device!
Install Android Studio
You can either install Xcode from the App Store, or Android Studio. Flutter needs an emulated device in order to run.
Once installed, open your new to_the_dogs app by using the File menu… Open… to_the_dogs directory. Your app’s main.dart will open (Flutter apps are written in the Dart progamming language).
For Android, from the Tools menu… AVD Manager… Click to + Create a Virtual Device. You can create a new virtual device of your choosing.
Once you’ve created your device, pull the menu down that reads no devices and select your device. Your device should appear shortly.
Now you can successfully launch your app at the command line by typing:
> flutter run
Now your new app should appear in the emulator you just picked. Make changes to the main program file – lib/main.dart – using your favorite text editor, then run again. You can also edit it in Android Studio and run with the green arrow run button.
Jazz it up with an image!
Your new app has a button to press and a basic display showing how many times it has been pressed. Let’s make the app more interesting by adding an image. On line one hundred, between const Text and Text instances, insert a new line of code…
Image(image: NetworkImage('http://www.cortazar-split.com/dog_origin.jpeg')),It will look like this…
     children: <Widget>[
       const Text(
         'You have pushed the button this many times:',
       ),
       Image(image: NetworkImage('http://www.cortazar-split.com/dog_origin.jpeg')),
       Text(
         '$_counter',
         style: Theme.of(context).textTheme.headline4,
       ),
     ],
Now run it…

> flutter run

If you nailed the typing, you’ve got a much more handsome screen.

Well done! What if you had used a different image instead? Would you get more clicks? Let’s put a feature flag on that image!
Create a Feature Flag in Split
If you haven’t created a free account, visit the signup page.
- Once in a the product, create a new split.
- Name the split multivariant_demo and give it the user traffic type.
- Add rules to the production environment.
- You’re not a simple “on” or “off” user. Add a treatment, and names the treatments “red”, “green”, and “blue”.
- In Attach configuration to your treatments section, switch to JSON format.
in blue:{"image":"http://www.cortazar-split.com/dog_melancholy.jpeg"}
in red:{"image":"http://www.cortazar-split.com/dog_origin.jpeg"}
in green:{"image":"http://www.cortazar-split.com/dog_on_the_couch.jpeg"} - Save changes. From the menu next to the Kill button, pull down and select “Syntax”
- Choose node.js and copy the authorizationKey shown. You will use it in the steps below, so keep it handy. It is your SDK type API key that you will use to install the Evaluator docker image.
That’s great! Back to coding…
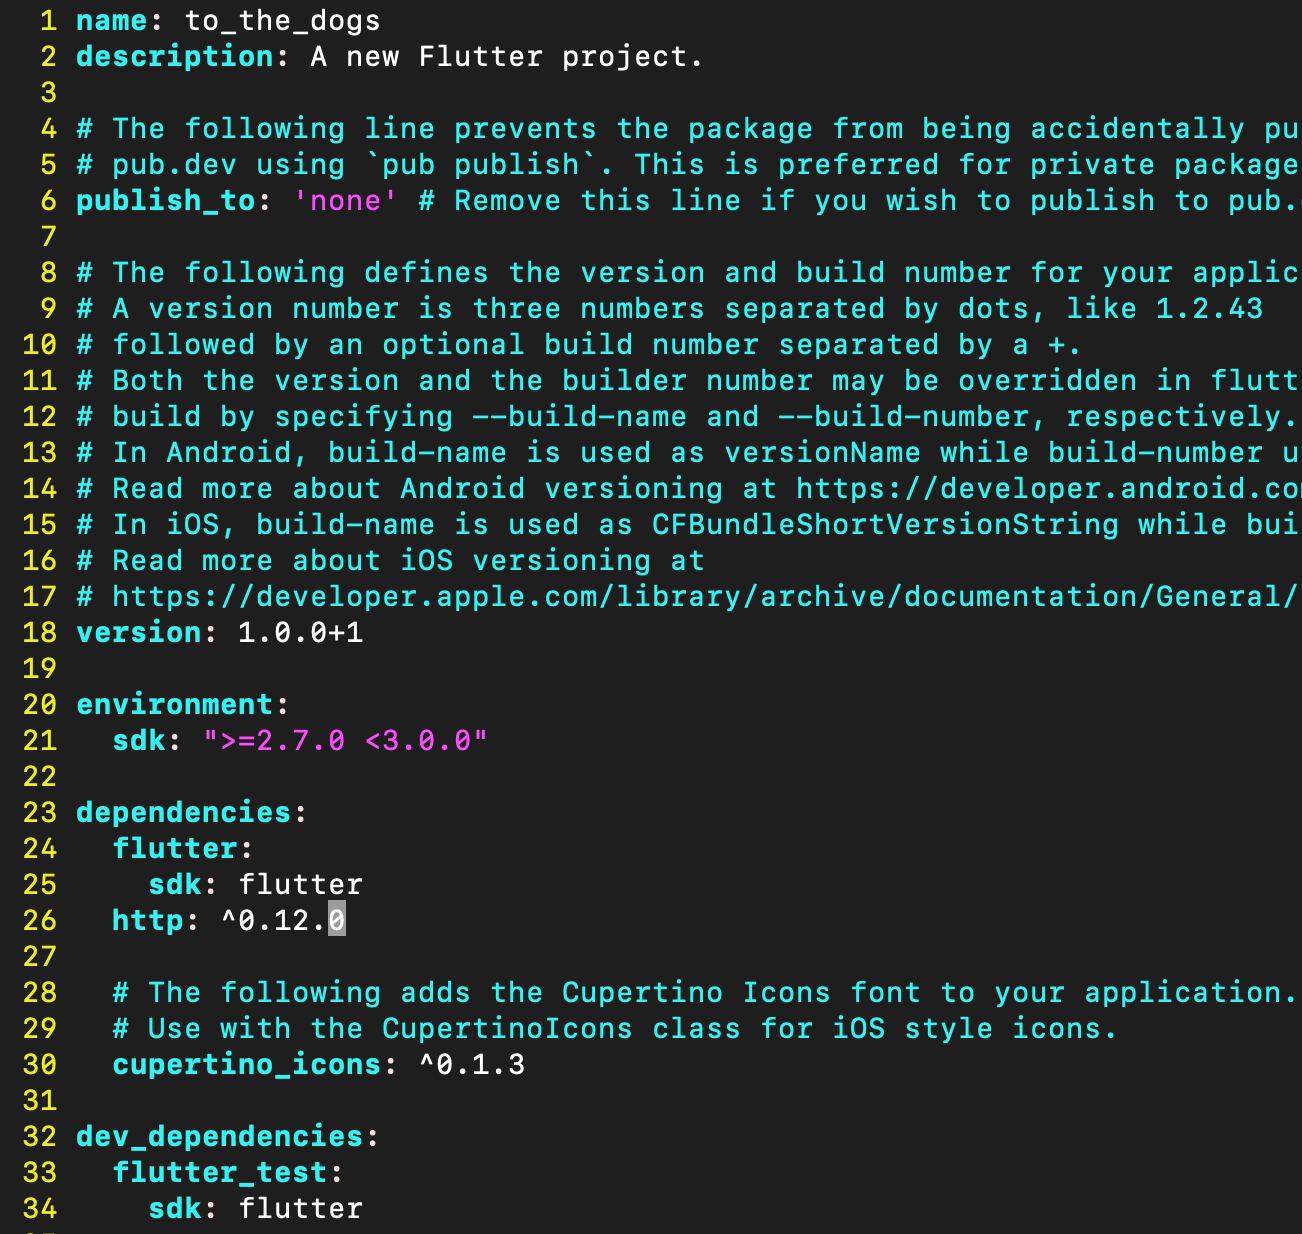
Add a dependency… on HTTP
We’re going to need to use an http client, so let’s add a dependency. Flutter keeps its dependencies in pubspec.yaml. Let’s add a dependency for http on line 26: http: ^0.12.0
Now get the new dependency with a new command:
> flutter pub get
You should also click “pub get” in the upper right corner of your pubspec.yaml screen in Android Studio. Finally, let’s declare some dependencies in lib/main.dart> line two:
import 'dart:convert';
import 'package:flutter/material.dart';
import 'package:http/http.dart' as http;
import 'package:http/http.dart';
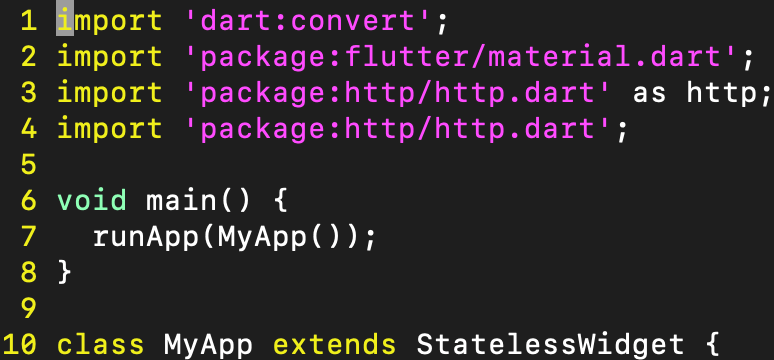
Note that we’ve added no dependencies on any Split software! Android Studio will complain that the http imports are unused. That’s OK for now… but you’ll have to run with a special switch…
flutter run --no-sound-null-safetyBuilding the Future
This is the trickiest step. Flutter’s preferred method of asynchronously loading user interface is with the FutureBuilder. The FutureBuilder is powerful, but it requires a coding leap. Instead of specifying one home screen, we must now specify three: 1) the screen while data is loading, in other words a progress indicator, 2) the screen when the data has loaded properly, and 3) the screen when something has gone wrong, displaying a useful error. Highlight your _MyHomePageState class build method and replace it with the one below.
Widget build(BuildContext context) {
return FutureBuilder<String>(
future: _split,
builder: (BuildContext context, AsyncSnapshot<String> snapshot) {
List<Widget> children;
if (snapshot.hasData) { // CASE #1 - data has arrived
Map<String, dynamic> splitResult = jsonDecode(snapshot.data.toString());
Map<String, dynamic> splitConfig = jsonDecode(splitResult['multivariant_demo']['config']);
String imageUrl = splitConfig['image'];
children = <Widget>[
Flexible(
child: Scaffold(
appBar: AppBar(
title: Text(widget.title),
),
body: Center(
child: Column(
mainAxisAlignment: MainAxisAlignment.center,
children: <Widget>[
Image(image: NetworkImage(imageUrl)),
Text(
'You have pushed the button this many times:',
),
Text(
'$_counter',
style: Theme
.of(context)
.textTheme
.headline4,
),
],
),
),
floatingActionButton: FloatingActionButton(
onPressed: _incrementCounter,
tooltip: 'Increment',
child: Icon(Icons.add),
), // This trailing comma makes auto-formatting nicer for build methods.
)
)
];
} else if (snapshot.hasError) { // CASE #2 - error retrieving data
children = <Widget>[
Icon(
Icons.error_outline,
color: Colors.red,
size: 120,
),
Padding(
padding: const EdgeInsets.only(top: 16),
child: Text('Error: ${snapshot.error}'),
)
];
} else { // CASE #3 - data hasn't arrived, but no error either... progress indicator!
children = <Widget>[
SizedBox(
child: CircularProgressIndicator(),
width: 240,
height: 240,
)
];
}
return Center(
child: Column(
mainAxisAlignment: MainAxisAlignment.center,
crossAxisAlignment: CrossAxisAlignment.center,
children: children,
),
);
}
);
}
At this point, your screen would know how to display, except that the FutureBuilder is called the FutureBuilder for a reason:
future: _split,
You now need to declare _split inside the _MyHomePageState class:
  static http.Client client = http.Client();
  static Future<String> getSplitTreatment() async {
     Response response = await http.get(
          "http://{your IP address}:7548/client/get-treatments-with-config?key=app-id&split-names=multivariant_demo",
          headers: {'Authorization': "foo1234"});

     print("response body: " + response.body);
     return response.body;
  }
  final Future<String> _split = getSplitTreatment();
You need to substitute the IP address of your machine.
Find your IP address on a mac. Find your IP address on a PC.
And now the http dependency is clear. In a nutshell, the FutureBuilder is waiting for an HTTP GET transaction to retrieve some JSON from Split’s Evaluator. The Split Evaluator is a RESTful interface for evaluating feature flags. This GET says, give me the treatment of a “multivariant_demo” flag for an app with unique identifier ‘app-id’.
But you’re not yet ready to run… there’s nothing listening on your localhost port 7548.
Install Docker Desktop
If you don’t already have Docker ready, install Docker Desktop on Mac. Install Docker Desktop on Windows
Install the Split Evaluator
The Split Evaluator is a node.js microservice (often delivered as a Docker image) that wraps the Split node.js SDK with a RESTful API. Just as shown above, you can issue an HTTP GET to retrieve a feature flag evaluation, including a complex JSON response like the one we parsed here to serve an image URL.
From your command line, run two docker commands:
		> docker pull splitsoftware/split-evaluator
		> docker run -e SPLIT_EVALUATOR_API_KEY={YOUR_SDK_TYPE_API_KEY} -p 7548:7548 splitsoftware/split-evaluator
The Evaluator can do all the same things as the SDK, including batch evaluations of many flags at once. It also supports the track call so you can send on those button clicks for use in an A/B test.
http://localhost:7548/client/track?key=my-customer-key&event-type=my-event&traffic-type=user&properties=\{"major":"1","minor":"2","patch":"14"\}' -H 'Authorization: {SPLIT_EVALUATOR_AUTH_TOKEN}'
Tying it all together
flutter run --no-sound-null-safetyYou can now switch images in your app using your split. To use Flutter with Split, deploy an Split Evaluator. Using features like the FeatureBuilder, build your screens dynamically so they can be monitored for changes in user behavior by alerting and statistically rigorous A/B testing.
If you’re interested in firing up an Evaluator and creating some flags, get in touch with me at david.martin@split.io
Thank you!

Leave a comment