Bugsnag and Split: Events Integration
BugSnag (a SmartBear company) monitors application stability. Split Software is a feature delivery platform.
Past integration work put Split feature flag evaluations into BugSnag errors so that BugSnag customers can see which features their end user was exposed to at the point they encountered an error.
This integration uses a BugSnag webhook to report errors to Split, where they become events eligible for inclusion in A/B test results.
How does it work?
BugSnag has webhooks builtin. By creating a webhook that reports errors, Split can provision a service to listen for errors. The service receives an error, transforms it into a Split event, and sends the event on to Split for use in metrics and experimentation.
The BugSnag errors have rich property information, and not all of it is sent to Split. Some of the properties are flattened in order to be suitable for a Split event.
What do you need to set it up?
For this version of the integration, the Split service is expected to be an AWS node.js lambda. The lambda could also be provisioned as a serverless function in another cloud, but the instructions are not provided. The installer is expected to be a Git user, have access to AWS, and understand how to provision new lambdas. It is also assumed you have both Split and BugSnag accounts.
Installation at the Command Line
The repository is at bugsnag2split.
Create a new directory and clone the integration code into it:
git clone https://github.com/splitio/bugsnag2split.gi
Change into the new bugsnag2split directory. Create a new SPLIT_API_KEY file:
touch SPLIT_API_KEY
Create a new server-side API token in Split, and copy it into this file. There should be no spaces or carriage return arount it. This token is used to validate the integration when it sends an event to Split.
Run an npm install:
npm install
Create a zip file for your soon-to-be-created lambda:
zip -r bugsnag.zip *
AWS Installation
Create a node.js lambda. On the code page, upload your bugsnag.zip file.
Under configuration, create a function URL for your lambda.
- No auth type
- Configure CORS
- Allow methods POST
Bugsnag Installation
Projects -> Data forwarding -> Webhook
Now paste in the function URL from the previous step.
Click to Test. Should be successful.
Now turn on “Every time an error occurs” in the config below. Click the checkbox to “Notify me every time an error occurs”. Update preferences.
At this point, the integration install is complete.
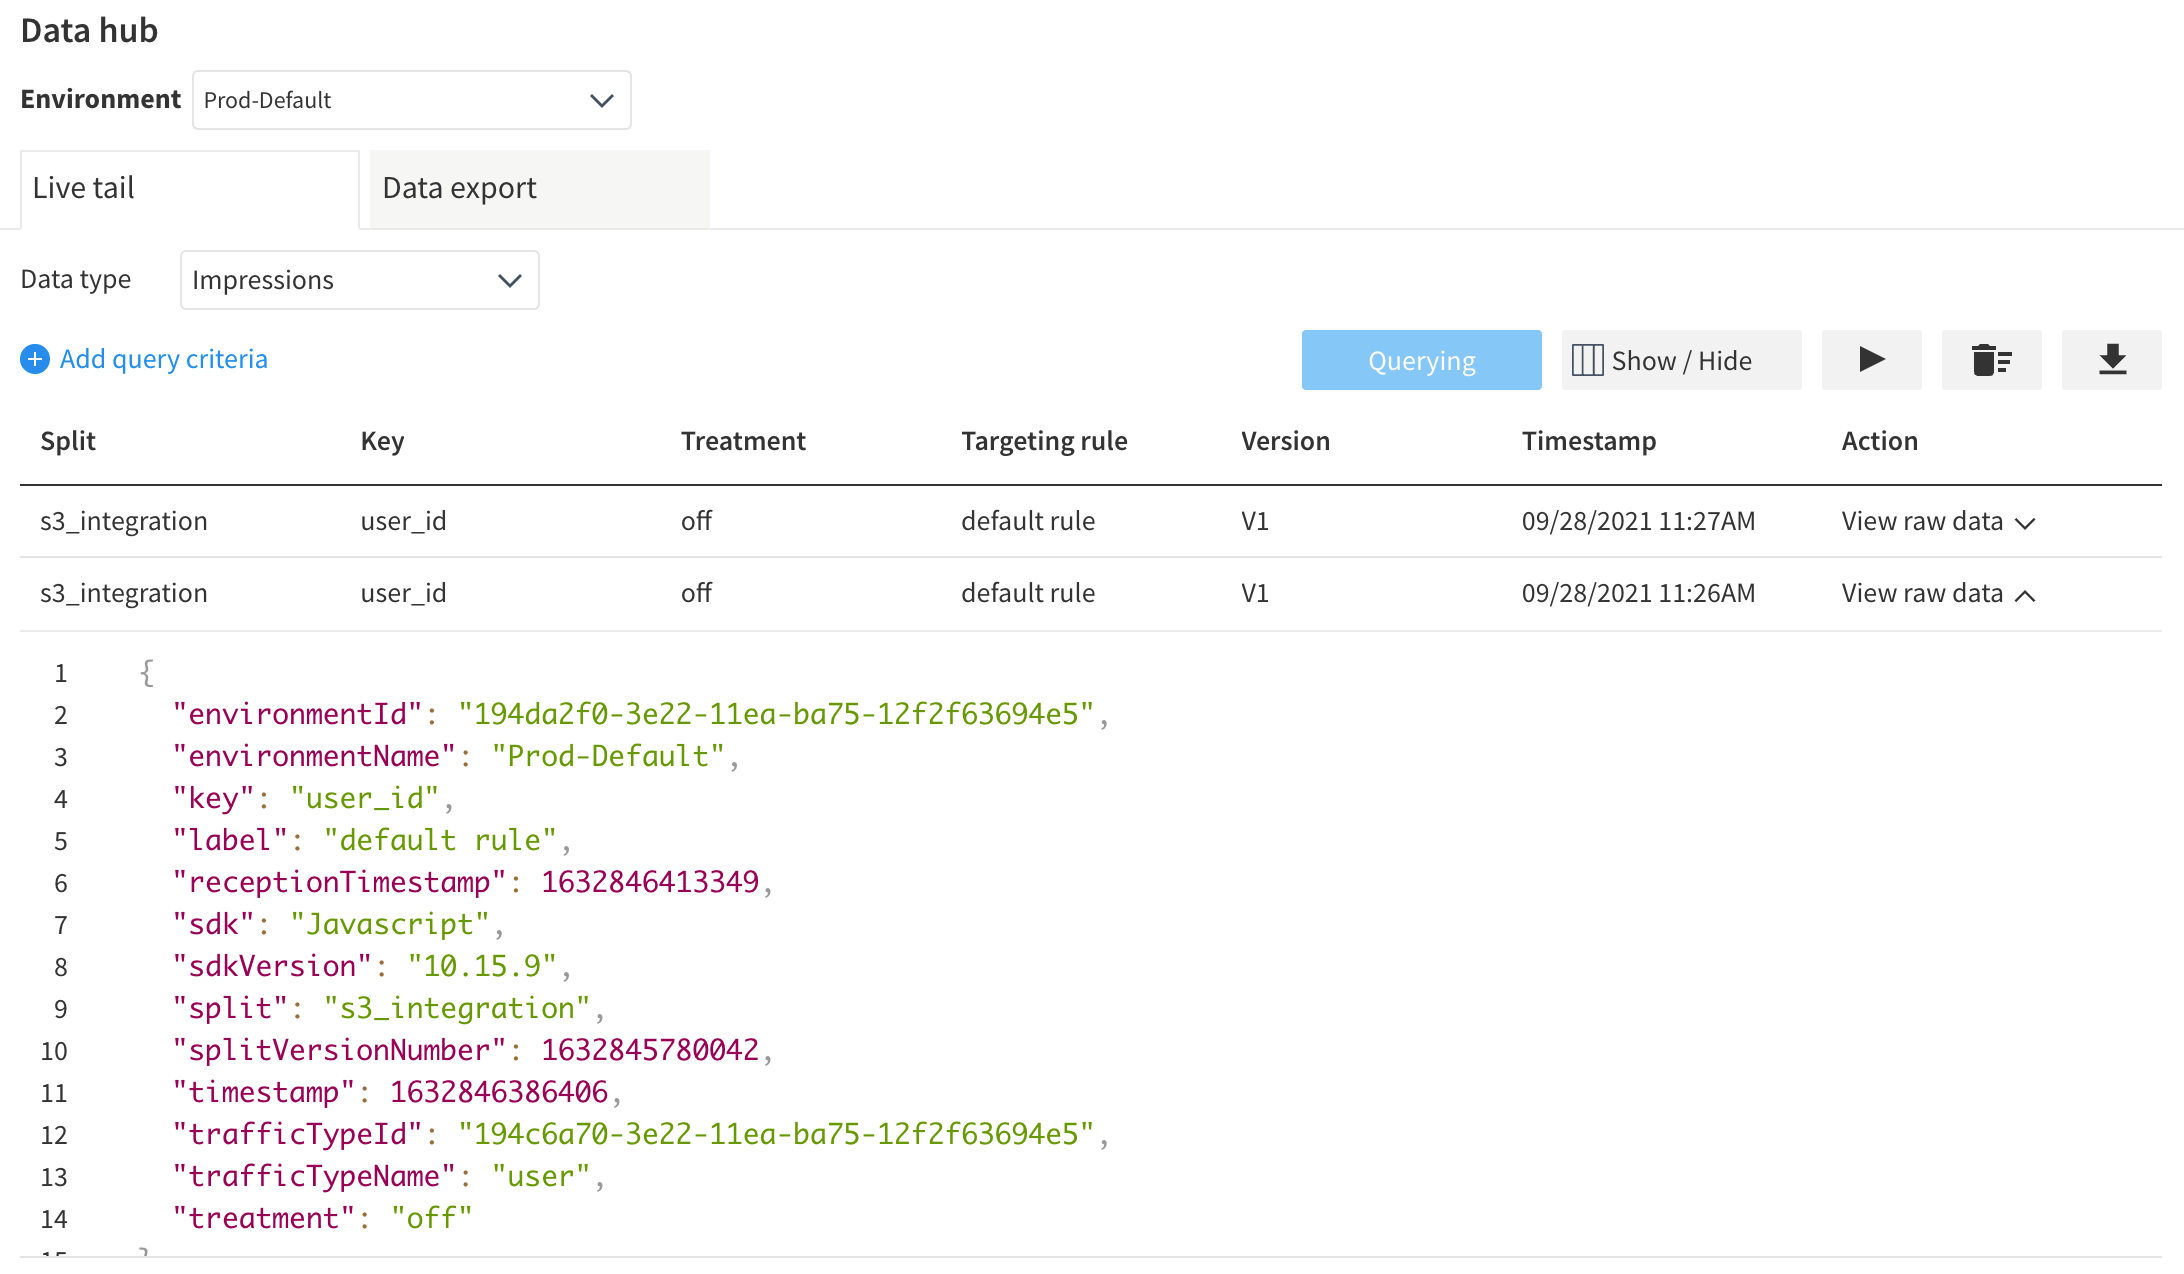
View BugSnag Errors in Split
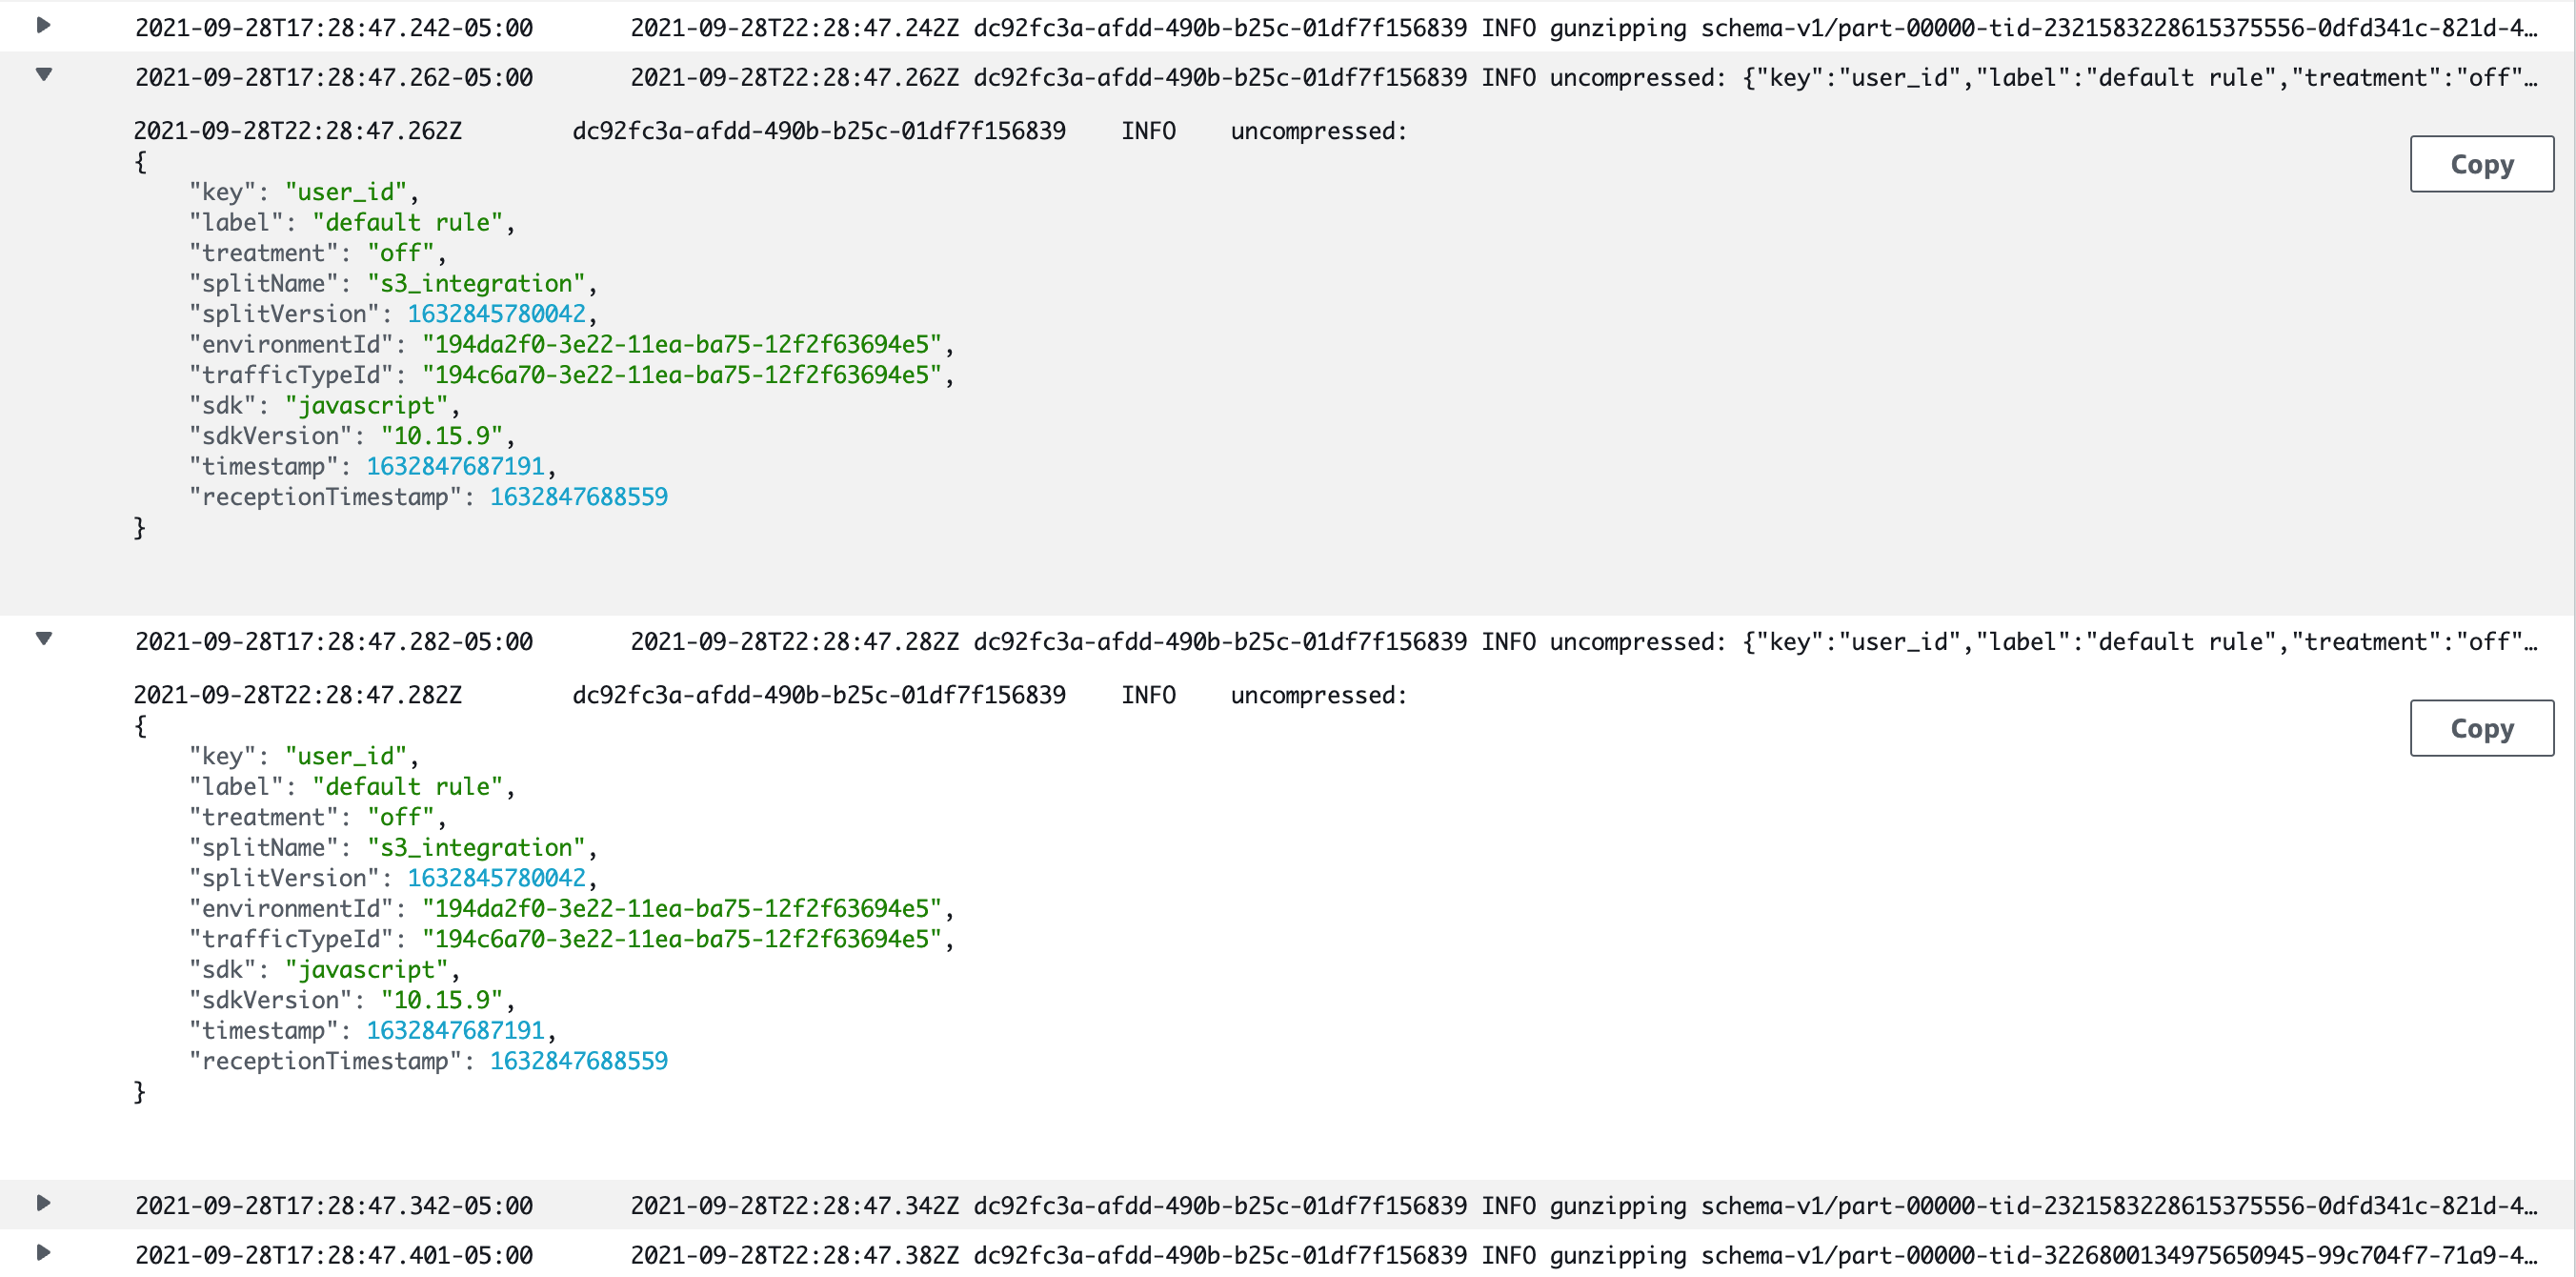
Using the DataHub, you can view errors as they arrive in Split. They have a lot of information available in properties.
{
   "environmentId":"194da2f0-3e22-11ea-ba75-12f2f63694e5",
   "environmentName":"Prod-Default",
   "eventTypeId":"bugsnag_error_wh",
   "key":"dmartin-bugsnagger",
   "properties":{
      "occurrences":"82",
      "device.browserVersion":"103.0.0",
      "releaseStage":"development",
      "user.name":"David B. Martin",
      "receivedAt":"2022-07-19T15:00:50.843Z",
      "device.id":"ckvcjhzya00003e5uichx3sxy",
      "app.type":"browser",
      "app.duration":"792196",
      "unhandled":"false",
      "device.browserName":"Chrome",
      "user.email":"david.martin@split.io",
      "requestUrl":"http://localhost:8080/bugsnag-split.html",
      "context":"/bugsnag-split.html",
      "id":"62d6c722009557e6c9b80000",
      "errorId":"628850cb3ae8290008a73487",
      "severity":"warning",
      "device.locale":"en-US",
      "user.id":"dmartin-bugsnagger",
      "device.orientation":"landscape-primary",
      "exceptionClass":"Error",
      "message":"error during donate click handling",
      "app.releaseStage":"development",
      "userId":"dmartin-bugsnagger",
      "url":"https://app.bugsnag.com/split-software/split/errors/628850cb3ae8290008a73487?event_id=62d6c722009557e6c9b80000&i=wh&m=oc",
      "device.time":"2022-07-19T15:00:50.607Z",
      "device.osName":"Mac OS X 10.15",
      "firstReceived":"2022-05-21T02:39:07.000Z",
      "status":"open"
   },
   "receptionTimestamp":1658242853018,
   "timestamp":1658242852567,
   "trafficTypeId":"194c6a70-3e22-11ea-ba75-12f2f63694e5",
   "trafficTypeName":"user",
   "value":0
}
A note on Split key
As always, the Split key of the error events must agree with the Split key of your impressions. In practice, you’ll want to configure the key in your BugSnag initialization.
Use the same ‘id’ key for your Split SDK configuration.
	Bugsnag.start({
		apiKey: '<bugsnag spi key',
		user: {
		   id: 'dmartin-bugsnagger',
		   name: 'David B. Martin',
		   email: 'david.martin@split.io'
	  	}
	})
A Hint on Triggering errors
If you want to stimulate some errors from your JS app, you can use the notify function of Bugsnag. In this example, a buttons onclick has been passed a clickHandler that creates a new exception. If your integration is fully installed, you’ll see the event arrive at the DataHub “momentarily”.
	function clickHandler() {
		alert('click! (error trigger)');
		Bugsnag.notify(new Error('error during test click handling'));
	}
Written with StackEdit.